You have your first skateboard but don’t know how to assemble it? Are you having problems putting on the griptape or mounting the bearings? Don’t worry, with our How To video and instructions you’ll have your skateboard assembled in no time.
» To the step-by-step instructions
Skateboard assembly instructions
Step by step to your complete boardGo straight to what’s causing you problems:


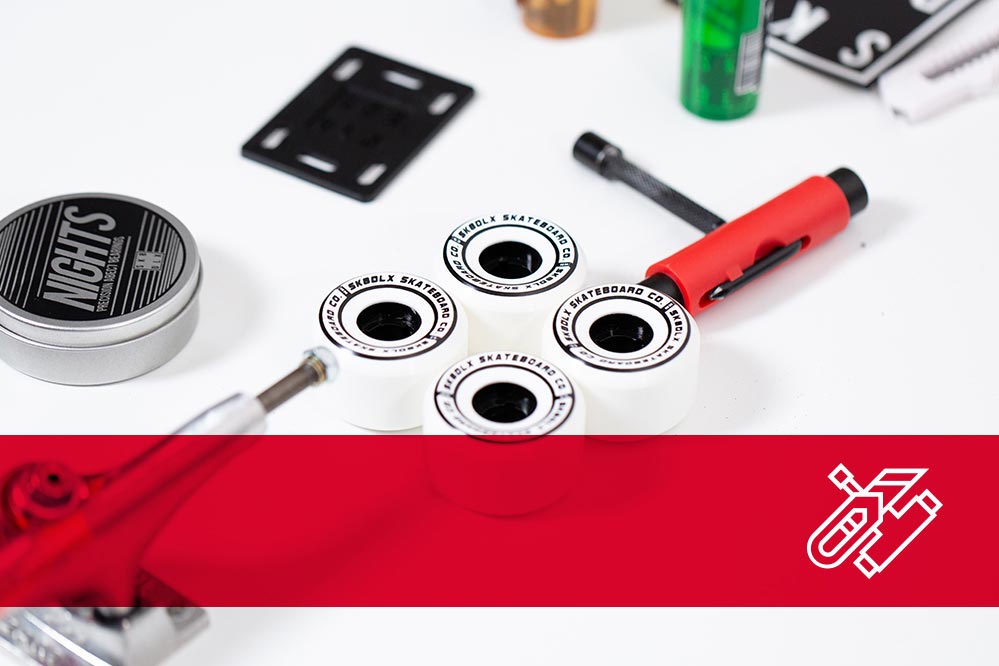
What you need to assemble your skateboard

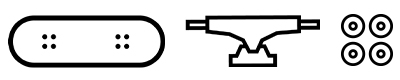
The individual parts of your skateboard
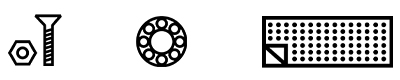
Tools and aids
- Carpet knife (cutter)
- Skate tool
- Optional: metal object such as a file, screwdriver or something similar
Tip: The easiest and best way to assemble your skateboard is with a skate tool. This has all the necessary parts combined in one tool. If you don’t have a skate tool handy, you can also screw your skateboard together with conventional tools. You can find information about the correct sizes of the keys here.
Optional parts
- Spacers (between the bearings)
- Shock pads / riser pads
- Deck rails
Tip: The easiest and best way to assemble your skateboard is with a skate tool. This has all the necessary parts combined in one tool. If you don’t have a skate tool handy, you can also screw your skateboard together with conventional tools. You can find information about the correct sizes of the keys here.
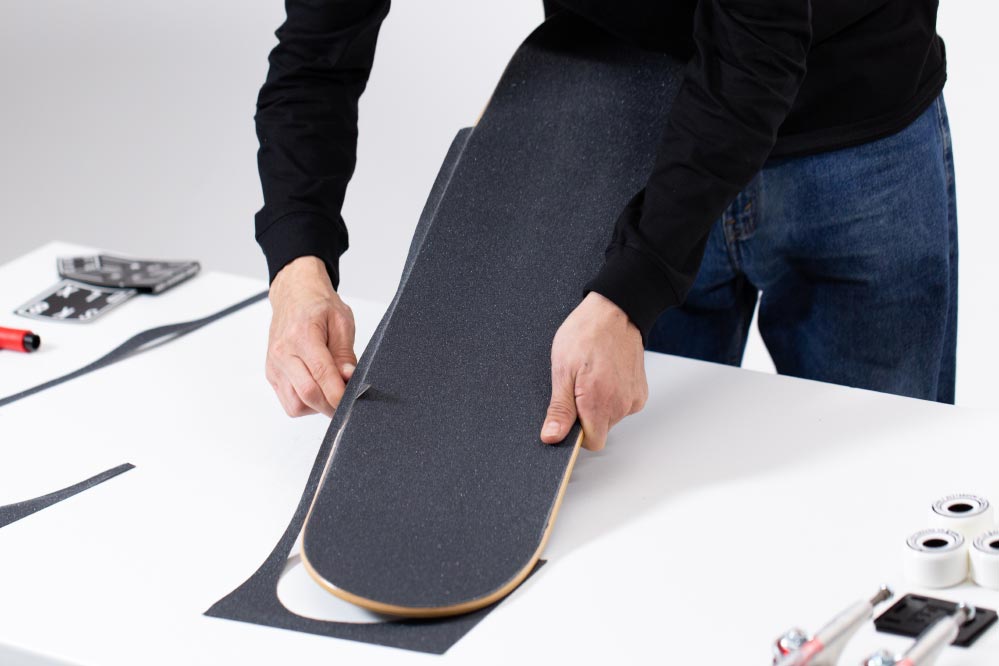
1. Putting Griptape onto the Skateboard Deck
1.1 Align deck and remove griptape backing


Place your deck in front of you with the graphics facing down and find the nose (front) and tail (back). If you have a griptape with a logo or graphic, make sure you put it on in the right direction.
The graphics of your deck and the embossing on the top can help you distinguish between nose and tail. Graphics are usually oriented “upwards or to the right” or point towards the nose. The embossing on the top of the deck is oriented so that it can be read when the nose is facing up or forward. In addition, the nose is usually slightly wider and steeper than the tail.
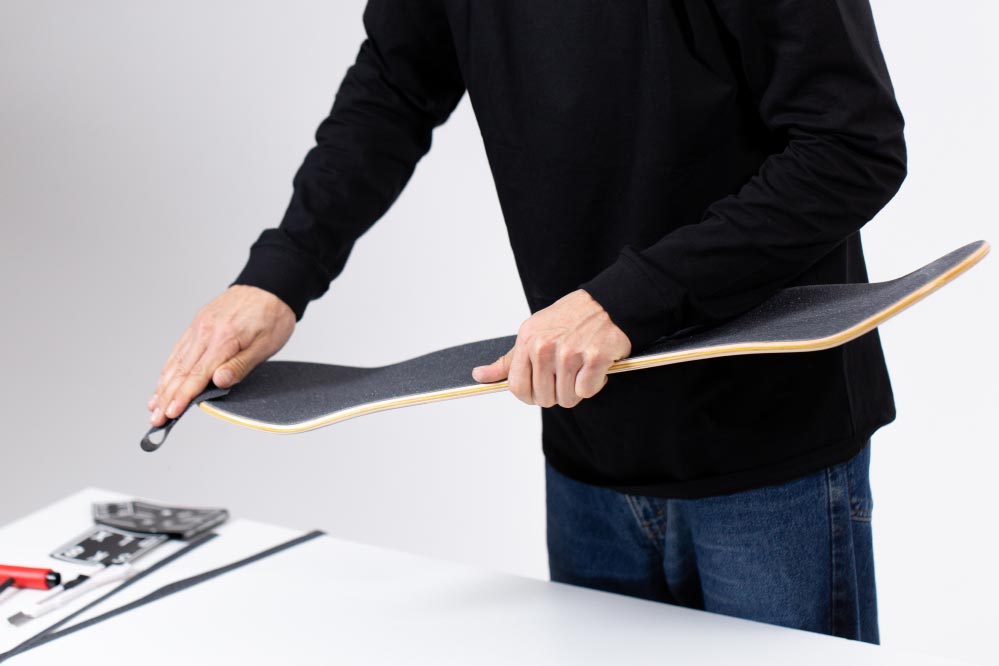
Now pull the griptape off the foil and make sure that it doesn’t stick to anything. Put the foil aside, because you’ll need it in a moment.
1.2 Putting on griptape


Take the griptape at both ends between your thumb and forefinger and center it over your deck so that it’s completely covered. To find the right alignment, we recommend that you put the griptape on the nose or tail first. Once you’re happy with the alignment, take the foil, place it on the griptape and press your grip piece by piece from the inside to the outside of the deck.
You can remove air bubbles with the edge of your hand or prick them with a cutter.
1.1.2 Tip: Putting on narrower griptape on wide decks


If your deck is wider than 9″, you’ll need to get wider griptape or get creative. For example, you can cut the griptape in half and leave some space in the middle when applying the two pieces of griptape. For even edges, simply turn the griptape with the edge on the outside.
Put on the griptape as described above.
1.3 File Griptape


Next you need a tool, ideally with a built-in file, a screwdriver, a truck or a metal object of your choice. Now file along the edge of the deck over the griptape to create an outline. The resulting template will help you to cut your griptape cleanly. It is sufficient to file a slight contour of your deck. You don’t have to file the griptape down to the wood.
1.4 Cut griptape
It can be helpful to cut the griptape on the nose or on the tail before you cut into it. Cut along the contour, keeping the blade slightly tilted towards the center of the deck.
Try to run the blade at a steady speed and in one stroke, being careful not to cut into the wood of the deck.
Safety first: The blade should never be pointed at you or others. It’s easiest if you angle the blade slightly towards the center of the deck from below and gently cut the griptape off.
1.5 Griptape finishing touches
You can use the leftover scraps to smooth the cut edges on the deck’s borders. This will give you a clean edge and your griptape won’t come off the deck as easily later. It’s best to tape the scraps together beforehand so they don’t stick to your clothes or anywhere else.
2. Screw skateboard trucks to the deck
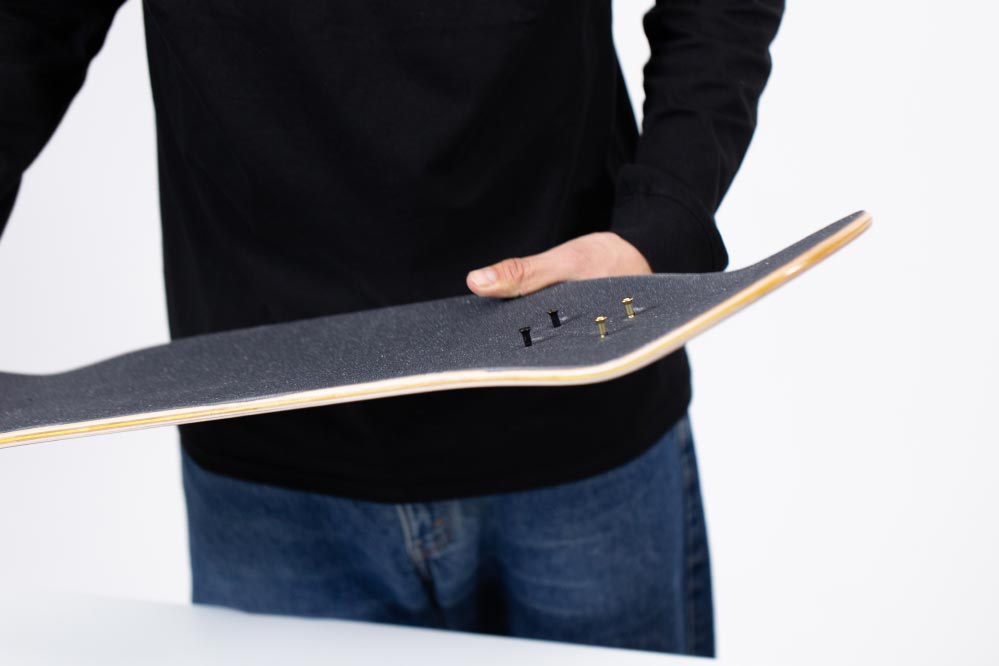
2.1 Poking holes in the griptape


Before you screw your trucks to the deck, you should poke holes in the griptape at the truck holes so that you can insert the bolts. Take a bolt from your mounting kit and push it lightly through the truck holes from below. This will make the griptape stand out a little from your deck.
You can pierce small holes at these points with the cutter. With the Phillips screwdriver of your tool or the bolts, you can enlarge the holes slightly.
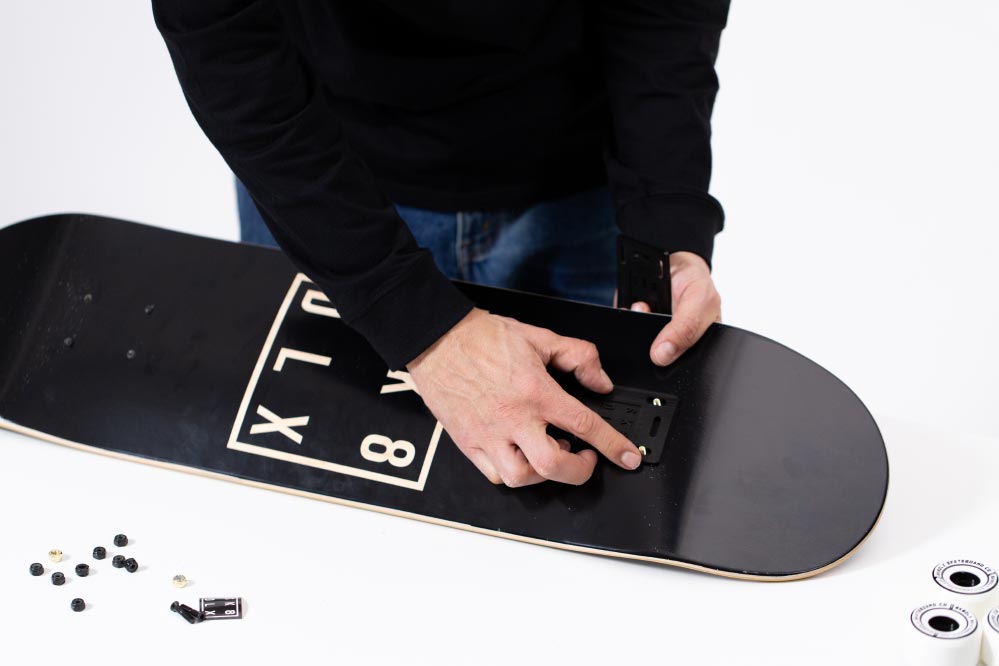
2.2 Insert the bolts through the truck holes
Insert the bolts through the truck holes from above. If colored bolts are included in your assembly kit, you can use them to mark the nose or tail.
2.3 Optional: Assemble shock pads / riser pads
If you want to use pads, you can now place them between the deck and the truck. Just put them on the bolts.
2.4 Bolting the trucks to the deck


Now put the trucks on the bolts. Make sure that the kingpins of the trucks face the inside of the deck. Use the nuts of your assembly kit to screw the trucks to your deck.
Use your skate tool and tighten the bolts so that the bolt heads are level with the griptape.
3. Insert bearings in wheels
3.1 Place bearing on axle
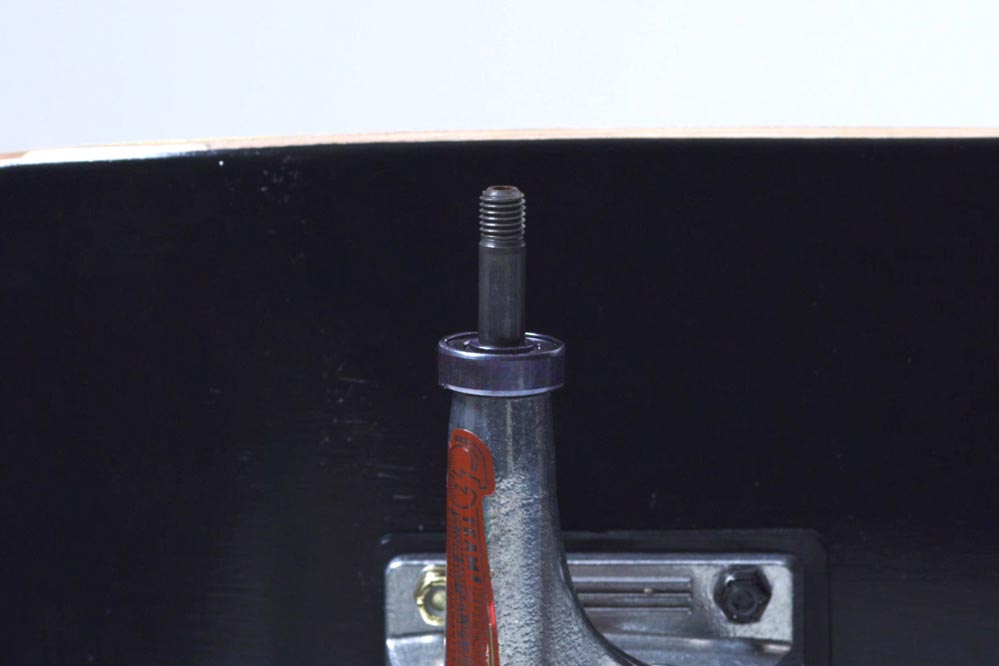
Loosen the axle nut and remove the upper of the two speed rings (small washers). Now put a bearing on the axle and make sure that the shield (cover) is facing downwards. If your bearings have shields on both sides, it doesn’t matter how you put them on the axle.
3.2 Press wheels onto bearing

Now press the wheel onto the bearing with both heels of your hand until the bearing is fully inserted into the wheel. You should hear a slight “click” as soon as it is properly inserted.
Make sure that you always place the wheel evenly on the bearing and press it straight down. This will prevent the bearing from being crooked in the wheel.
Repeat the step for the second bearing on the other side of the truck.
3.2.1 Optional: Insert spacers
Spacers ensure that your bearings always remain parallel to each other. Place the spacer on the second bearing and press the wheel onto the bearing as usual.
3.2.2 Tip: Lever bearing out of wheel
If a bearing is crooked or incorrectly placed in the wheel, you can carefully lever it out of the wheel with the axle.
4. Screw the wheels to the trucks

Put the second speed ring back on the axle and screw the axle nut onto the thread. Tighten the nut, but leave a little play for the wheel to move. When it feels tight, you can turn the nut back half a turn.
Repeat the process for the remaining wheels and your setup is ready!
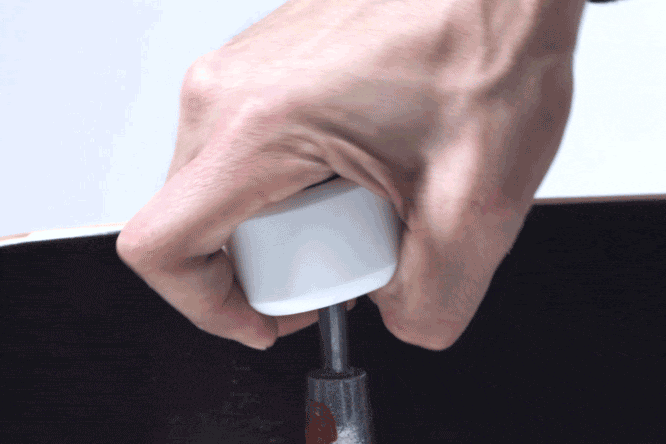
5. Adjust the steering behavior of the trucks


You can adjust the steering behavior of your trucks by adjusting the kingpin. Tighten the kingpin nut further (to the right or clockwise) to make your trucks less responsive. Loosen it a little (to the left or counter-clockwise) so that your trucks become looser and easier to steer.
The steering behavior of a skateboard is strongly linked to your body weight. If your trucks are new and they don’t steer the way you want them to, despite the adjustment of the kingpin, then your bushings may be too hard or too soft. You can find more detailed information about bushings and body weight here.
If the steering behavior doesn’t change even though everything fits, it’s probably because your bushings are worn. Due to the constant pressure, bushings give way over time and no longer achieve the desired effect. In our shop, you’ll find a large selection of replacement bushings.
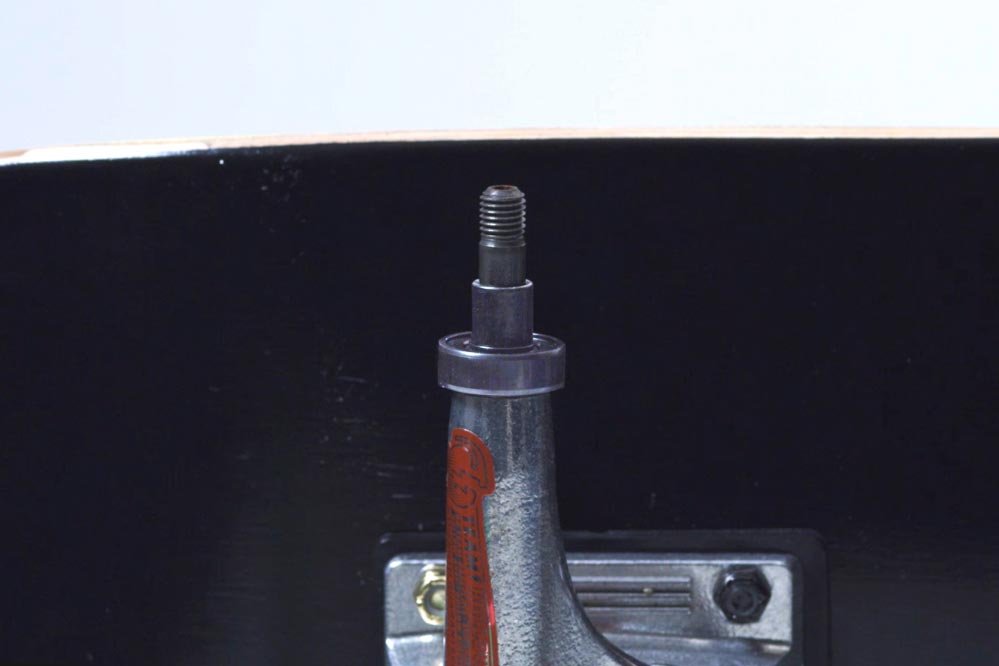
6. Optional: Attach deck rails
6.1 Align deck rails
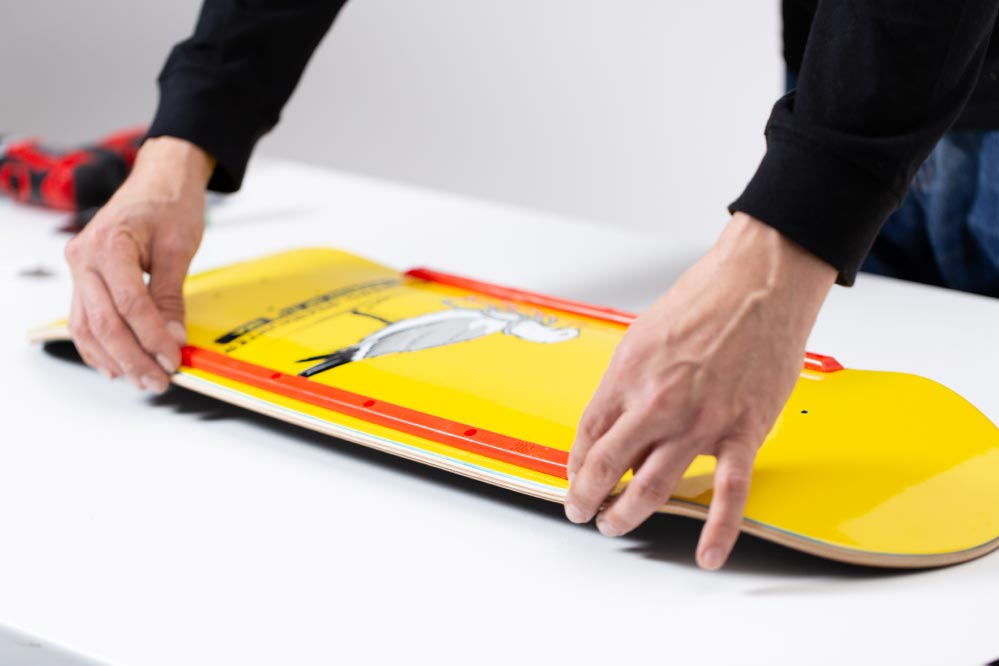
For longer and faster slides, you can attach rails to your skateboard. Rails are especially popular with bowl riders.
Place your rails on the deck as desired and align them. Ideally, they should have a little space between them and the edge of the deck and run parallel to each other.
6.2 Screw down deck rails
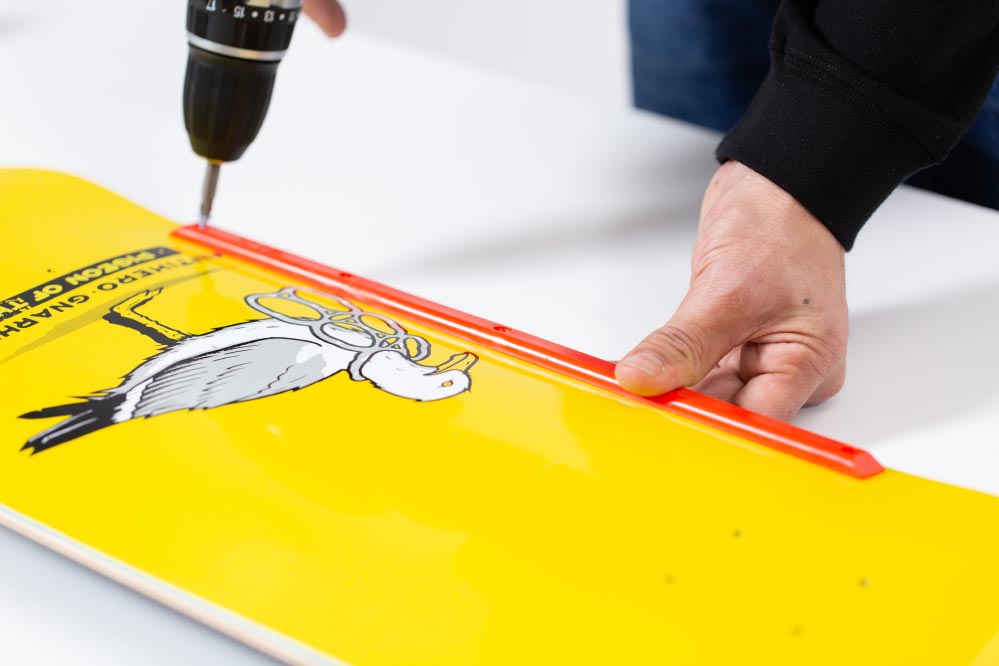
Start with the middle screw and tighten the screws one after the other from the inside to the outside.
Recommendations for mounting your skateboard
We recommend that you assemble your skateboard with a suitable skate tool. Alternatively, you can also use conventional tools. For the bolts of the assembly kit, you can use a Phillips screwdriver or a 6mm Allen key, depending on the type of bolt and a 10mm wrench. A 13mm and a 14mm wrench will fit the nuts of the trucks and the kingpin. If you find it too tedious to use normal tools, you can easily order skate tools and all the individual parts you need for your skateboard in our online skate shop.
To the skate tools To the skateboard hardgoodsIf you are looking for a new setup, our Skateboard Configurator will help you. The configurator ensures that all the parts fit together. This is how you can get your new skateboard quickly and easily.
You’ve screwed together your new skateboard and want to learn some tricks? Our trick tips will show you how it works!
Skateboard Configurator Skateboard Trick Tips